Dell Laptop Screen Replacement in Patna
In today’s digital age, laptops have become an integral part of our daily lives. Dell laptops, known for their performance and reliability, are widely used across the globe. However, like any electronic device, laptops can encounter issues over time. One common problem users face is a damaged or malfunctioning screen. Fortunately, replacing a Dell laptop screen is a manageable task that can bring your device back to its full glory. In this guide, we’ll walk you through the step-by-step process of Dell laptop screen replacement.

1. Gather the Necessary Tools: Before you start the replacement process, ensure you have the required tools. This typically includes a small Phillips-head screwdriver, a plastic spudger or pry tool, and a soft cloth to protect the screen.
2. Power Off and Disconnect: Begin by turning off your Dell laptop and disconnecting it from any power source. It’s crucial to work on the laptop in a safe and powered-down state to avoid any electrical hazards.
3. Remove the Battery: If your Dell laptop has a removable battery, take it out to ensure complete safety during the replacement process.
4. Locate and Remove the Bezel: Carefully examine the screen bezel (the plastic frame surrounding the screen). Gently pry it off using the plastic spudger or pry tool. Be cautious not to damage the bezel during this step.

5. Remove the Screws: Once the bezel is removed, you’ll likely find screws securing the screen in place. Use the Phillips-head screwdriver to carefully remove these screws. Keep track of them, as you’ll need them later.
6. Disconnect the Display Cable: Locate the display cable connected to the back of the screen. Carefully disconnect it, ensuring minimal force to avoid damaging the cable or connectors.
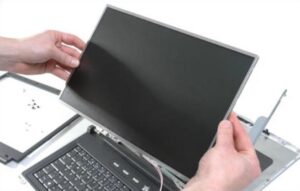
7. Remove the Old Screen: With the screws and cable detached, gently lift the damaged screen away from the laptop. Be cautious not to damage other internal components during this process.

8. Install the New Screen: Place the new screen in the same position as the old one and secure it with the screws you removed earlier. Reconnect the display cable, ensuring a snug fit.
9. Reattach the Bezel: Carefully snap the bezel back into place, making sure it fits securely around the edges of the new screen.
10. Reassemble and Test: Reattach the laptop battery (if applicable), power on the laptop, and check the new screen for any display issues. If everything looks good, you’ve successfully replaced your Dell laptop screen.

By following these step-by-step instructions, you can perform a Dell laptop screen replacement with confidence. However, if you’re uncomfortable with the process, it’s advisable to seek professional assistance to ensure the job is done accurately and without any complications.
